Showing posts with label DIY. Show all posts

Saturday, July 7, 2018

Easiest way to paint cabinets EVER

I'm back! Is this a joke? Nope, I AM BACK!  I took a semi 2 year hiatus, (nearly 3), after the birth of my last son in 2016 and for much of my pregnancy the year before.

I found myself, overwhelmed, and all too consumed with being a mommy to a new baby all over again, to focus on much else.  In those years, I had fawned over, projects I'd like to complete one day, as he was older.  I craved to put a paint brush in my hands again. I desperately NEEDED my creativity to come out, since it had been such a long time, since I had been able to start and finish a DIY project.  I stalked the internet (mostly instagram hashtags) over the years, for the easiest ways to paint my kitchen cabinets.  I was settled on the fact that I would have to painstakingly sand and primer and remove EVERYTHING.  I didn't like this idea one bit.

One, it would take way too much time out of my mentally worn out days, and two, I didn't desire to chase a busy body toddler around during all of the chaos it would take.

Like everyone else looking for short cuts, I looked into chalk paint.  There wasn't any ONE particular source I gathered all of my information from, but multiple.  In the end I decided, I would use the cheaper of brand in the chalk paint world and seal it with a polyacrylic finish.

Below: What my little heart desired to use for this project.


So far, I've only managed to complete the TOP row, and one bottom set.


So, let me fill you in.

First, I ended up using 2 paint brushes that I felt were good for ME, and MY hands, and I did the first coat, BUT ONLY after I used KRUD KUTTER to degrease, and then a bucket of hot water and diluted dawn dishsoap to have a super clean surface.

My cabinets started off as builder grade shiny oak. YUCK. Nothing I myself have ever loved.  I made the decision one night at 2 am, that I would do the paint in place, and only remove the knobs on the cabinets.  There was no way on God's green earth I would have time to remove everything.  So that that I painted my first streaky, hideous coat of Rustoleum's chalk paint.

Below: If you decide to chalk paint your cabinets, don't let the streaky first and second
 coats deter you.  Those coats will always look like trash ;)


The next morning I did my second coat, and mid afternoon my third coat.  I waited a day, and then did the fourth coat.  After a few hours of dry time, I did my first coat of matte polyacrylic with a brush, making sure to not have any drips.  I let it dry 5 hours, and did my second coat with a foam craft brush.


In all I put on 4 thin coats of the polyacrylic to seal everything.  I let the cabinets cure for a couple of days, and added the knobs back.  I did the scratch test with my finger nail, and no paint came off.  SUCCESS!!

It's been 3 weeks now, and so far so good.  I just need to find time to do the lower ones.

I just figured I would make this quick update, for anyone looking for the absolute EASIEST way to repaint your cabinets:) Much luck, dear readers!  I can't wait to finish, and start more projects and show them with you all.  It's been so long.

Sunday, July 9, 2017

Our Farmhouse Table

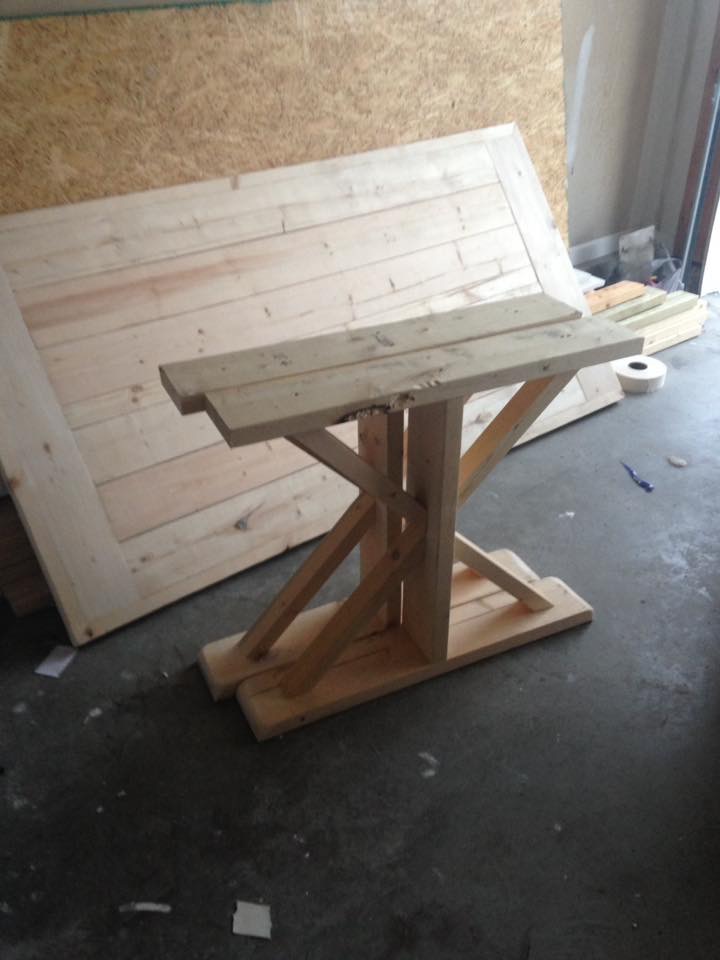
We purchased an unfinished table last month, from a local carpenter. He only charged $300 for the table with two benches. I love to finish items myself, and so between juggling the kids, (mostly Danny), and our trip to Jersey, I finally completed this beauty.  I've been wanting a large table that we could all sit at and enjoy meals together.  Admittedly, and non super mom status, our typical dinners consisted of me serving the kids at the old pub table, and Stephen on the couch, while the tv blared and I scrambled to feed Danny, only to eat last, with little to no conversation. This was a must for me.

So this is how we picked up our lovely table. Our carpenter did a great job and sanded it.


I made up my mind that I would be using minwax stain in special walnut. The first night I stained the table top, bottom and the top portion of the benches.


Over the next several days, I painted the legs with Zinnser primer. In total, I used 3 thin coats. I decided that the primer would serve as my paint, because I just don't have it in me to do more. (
Danny keeps me busy).


At this point, we had gone to Jersey for a few days.  Once we settled back home, Stephen assembled the table for me.  I lit up over it. 


 I let it sit a few days and then started my 3 coats of rustoleum Satin polyurethane.  I applied it thinly, using only a foam wedge craft brush.  


It's safe to say I'm in love with it. I'm in love with it, and my 34 year old self is not as energetic for these things much more.

And to think, I still want to paint our kitchen cabinets. 

Thursday, October 20, 2016

Guest Bathroom Revamp


Another bathroom, another makeover.  This one was no where near as drastic as the one from my 65 rancher - (the old house), however, it just goes to show what a little paint and accessories can do to brighten things up.

First, let's take a look at the before images.  Let me apologize in advance, for the fact I used my I PHONE for the majority of the photos. I was 35 weeks pregnant when I decided I wanted to sand and paint the bathroom vanity earlier this year. To be honest, I was too lazy to break out my decent camera.

Moving along...
BEFORE: It was a beautiful blue color, but I wanted a calming neutral

 Below: There was just too much going on and it wasn't my personal taste.

I started by painting my bathroom with the left over paint that I used in my bedroom and my kitchen.  It was also a favorite of mine from my old house; Valspar's Lyndhurst Celedon Green. Depending on the lighting this color takes on various shades. The one consistency, is that it is always spa like and calming.

My next step was, replacing the shower curtain and rugs. I purchased a nice ruffle shabby chic shower curtain and rugs from Home Goods. I spent less than $30 on everything. 


 While I like the simple builder grade vanity, I really wanted something brighter. I love white furniture and cabinets, but I've never painted cabinets in my life. I was a little hesitant, even though I have done a number of furniture pieces, this was scary for me...

Below: Before, its nice, but I wanted white


Below: I used a handheld electric sander and took the sheen off the cabinets. I thought about 
using a stripping agent, but I was very pregnant and didn't feel like dealing with the fumes.


I started by priming with Zinnser Primer. I did a total of 
3 coats of primer and I waited a full 24 hours between each coat.


Below: I bought a small can of Glidden paint from Wal Mart that was only $9.
 I picked the whitest paint swatch I could find and had them tint the paint for me.


I ended up doing 2 coats of this paint with 7 days between each coat - I wanted to ensure the paint would adhere and cure properly so that I would not have a messy finished product.  I also allowed 7 days of curing before I placed the doors and drawers back on.  


I found these lovely glass knobs on eBay with hardware included for $3 a pop with free shipping. I've seen similar knobs go for up to $20 a set. I was ecstatic with my find.


The photos below were taken with my actual camera. What a difference that makes, huh?!  I absolutely love the way the new bathroom turned out. It went from a loud and busy bathroom, to a quiet and calm spa like bathroom. I'm pleased that I took the chance and trusted myself enough to do the vanity cabinet painting.  If I could do this in my last trimester of pregnancy, I think ANYONE can. It was a little time consuming, but well worth it.  Stephen even gave me the okay to paint our kitchen cabinets once Danny is a little older and I'm not having to hold him all the time. (haha).

Below: AFTER!! LOVE!!


Below: I also opted for an above toilet storage which I purchased at Wal Mart for $40 on sale.


Cost breakdown of the bathroom revamp:

Note: These items I had on hand. (What they would cost you):

- Bathroom wall paint: Valspar's Lyndhurst Celedon Green in Satin - less than half a gallon 1 coat (about $20)
- Rollers etc - $6 (cheap set from Wal Mart will do).
- Coastal accessories - Free from my old home, but the clear jar was a cookie jar form Wal Mart at $7 I placed starfish inside that you can obtain online or at any coastal shop for dirt cheap, the balls were from Cracker Barrel and cost $4 each
- Above toilet storage - $40

Totals: $ 77

Cabinet Cost:

- Sander - FREE I have this
- Zinnser Primer - $20 with plenty leftover
- Good Paint Brush - $13
- Foam brushes (for sides) $4 for a big bag at Wal Mart
- Glidden paint - $9
- Cabinet pulls $12 for all 4

Total Cabinet Revamp Costs:  $55 (and I have leftover materials for future projects)

Totals For Entire Revamp: $132

I would love to see your DIY cabinet renovations, dear readers! Please feel free to share them with me in the comments :)